AD PLACEMENT
Coffee Blooming Technique: The Secret to Perfect Brewing for Beginners

AD PLACEMENT
Hey Brewmates! Remember that first time you upgraded from instant coffee to a fancy brewing method? That was me not too long ago, switching from the traditional Indonesian tubruk method to my first V60 pour-over. Talk about a game-changer! But here’s the tea (or should I say coffee?) – I had no clue that this thing called “blooming” existed until I saw coffee grounds puffing up like a tiny volcano.
If you’re scratching your head wondering what this coffee blooming hype is all about, you’re in the right place. This simple technique is literally the difference between a meh cup of coffee and one that makes you go “where have you been all my life?” Let’s break down this essential first step that coffee geeks swear by!
Quick Facts
- Blooming allows trapped CO2 to escape from freshly ground coffee
- Typically requires 30-45 seconds with just enough water to saturate the grounds
- The ideal water amount is approximately twice the weight of your coffee
- Skipping this step can lead to uneven extraction and sour or bitter flavors
- Fresher coffee produces more bubbles during blooming than older beans
What is Coffee Blooming?
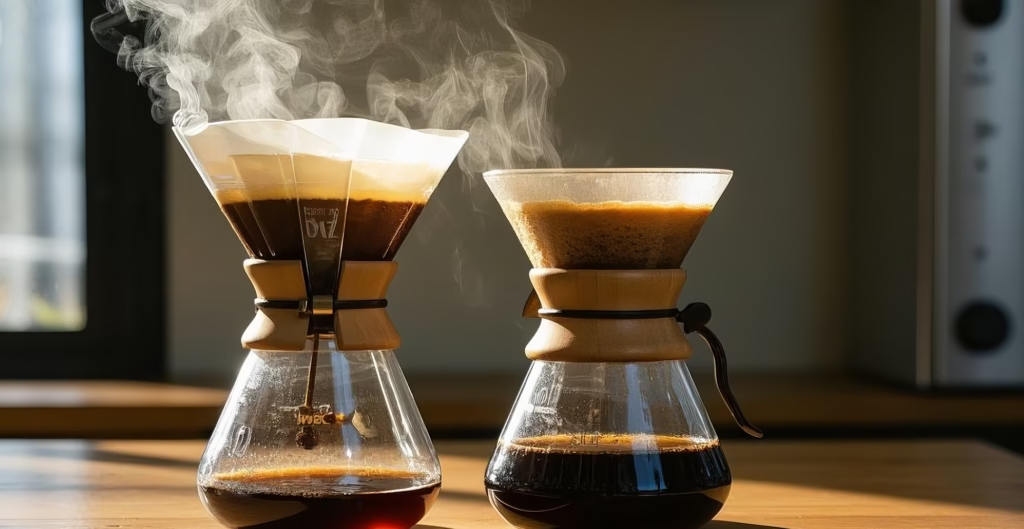
Coffee blooming is essentially the coffee world’s version of a warm-up exercise. Just like you wouldn’t jump straight into an intense workout without stretching, your coffee grounds need a moment to prepare for the main extraction. When coffee beans are roasted, carbon dioxide gets trapped inside. This gas continues to release slowly over time (a process called degassing), but a significant amount remains within freshly ground coffee.
When you first pour hot water onto these grounds, the trapped CO2 needs to escape before water can properly penetrate and extract all those delicious flavors. If you’ve ever noticed bubbles forming on top of your coffee bed after the initial pour, congratulations – you’ve witnessed blooming in action!
AD PLACEMENT
Think of blooming as the coffee’s “first impression” moment. According to Scott Rao, a renowned coffee expert, this process allows for better extraction by removing gas barriers that would otherwise create channels in your coffee bed and result in uneven flavor extraction.
When done correctly, blooming can:
- Enhance the aromatics in your final cup
- Promote even extraction throughout the coffee bed
- Reduce overall bitterness in your brew
- Bring out the unique flavor characteristics of your coffee beans
During my early pour-over journey, I completely overlooked this crucial step. Like many beginners, I was impatient to get to the finished product. But trust me on this – those extra 30-45 seconds make a world of difference in your final cup.
Also Read: Ethically Sourced Coffee: Shocking Truth About Consumer Struggles in Developing Economies
As a beginner, I didn’t think much about blooming when I used the traditional Indonesian tubruk method. I simply brewed according to the ratio I preferred. However, when I got my first V60, blooming became crucial to my brewing process. I learned mostly through online resources and YouTube tutorials, which opened a whole new world of coffee brewing for me.
AD PLACEMENT
How to Perform Coffee Blooming
Now that we understand why blooming matters, let’s get into the practical side. The process itself is surprisingly simple, but like most things in the coffee world, precision makes all the difference. Here’s how to nail your blooming technique:
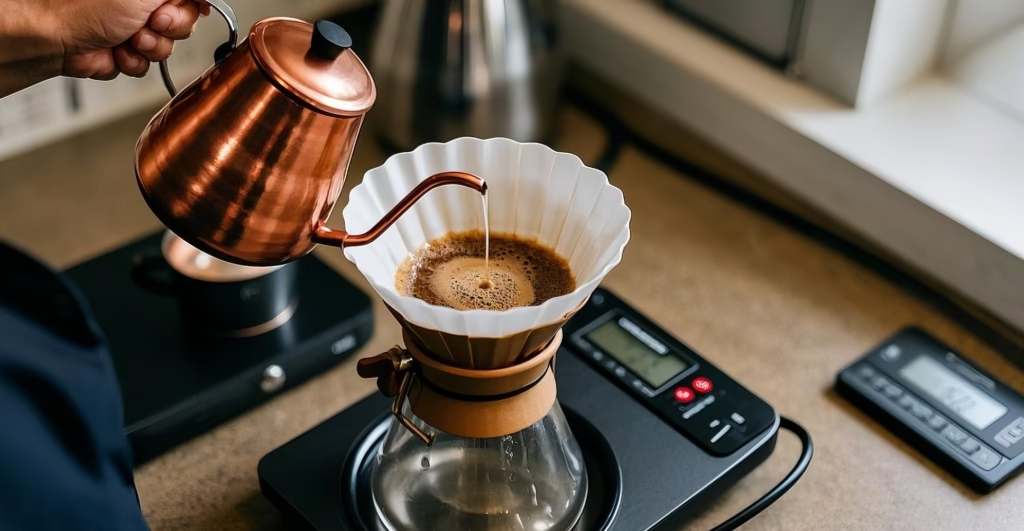
Step 1: Prepare Your Equipment
Before you begin, make sure you have:
- Freshly ground coffee (medium-fine for pour-over)
- A scale for precise measurements
- A timer
- Filtered water heated to 195-205°F (90-96°C)
- Your brewing device (V60, Chemex, or other pour-over equipment)
Step 2: Measure and Pour
- Place your grounds in the filter
- Start your timer
- Pour enough water to thoroughly wet all the grounds – usually about twice the weight of your coffee. For example, if you’re using 15g of coffee, pour about 30g of water.
- Pour in a circular pattern starting from the center, ensuring all grounds get evenly saturated
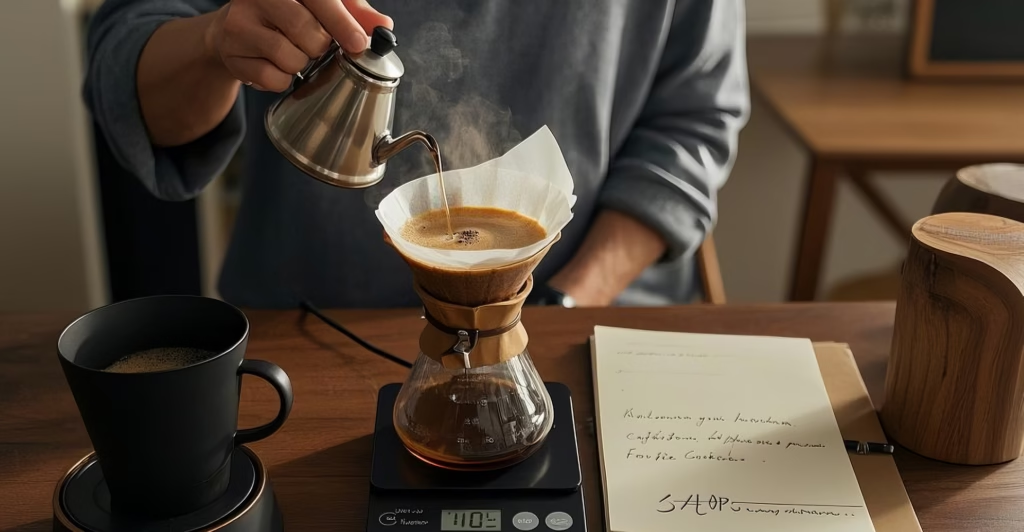
Step 3: Wait and Observe
Now comes the important part – waiting. Allow the coffee to bloom for 30-45 seconds. During this time, you’ll notice bubbles forming as CO2 releases from the grounds. The coffee bed will swell slightly and may even rise a bit.
This is one of my favorite parts of brewing with the pour-over method. There’s something almost meditative about watching the coffee come alive – it’s like seeing the beans wake up and stretch before they start their day!
AD PLACEMENT
Step 4: Continue Your Brew
After the blooming phase is complete, continue with your regular brewing method. You’ll find that the subsequent pours extract more evenly, resulting in a more balanced cup.
Tips and Tricks from Experience
As someone who transitioned from traditional brewing methods to pour-over, I’ve learned a few things about blooming that might help fellow Brewmates on their coffee journey:
1. The Perfect Ratio
I personally use twice the weight of coffee for my blooming water. For instance, with 18g of coffee, I’ll use 36g of water for blooming. This ratio has consistently given me the best results, ensuring all grounds are saturated without having excess water dripping through too quickly.
2. Consistency is Key
Blooming is just one part of a larger process. For truly exceptional coffee, I’ve found that being precise with every aspect matters tremendously. I’m almost obsessively strict with my coffee ratios and brewing times at home to achieve maximum results. Even though I’m brewing at home, not working as a barista, I believe we all deserve to experience that luxurious coffee taste!
According to specialty roaster Counter Culture Coffee, consistency in your blooming technique contributes significantly to cup-to-cup reliability in flavor.
3. Common Challenges
Interestingly, I rarely have issues with the blooming process itself. My biggest challenge has always been achieving the perfect coffee grind consistency. If you’re using a hand grinder like me, this might resonate with you too. But that’s what makes home brewing an adventure – experimenting with different variables.
I’ve even tried blooming for longer periods (up to 60 seconds) and using three times the coffee weight in water. These variations produce noticeably different results that I look forward to sharing more about in future articles.
4. Watch Your Scale and Timer
Always pay attention to your coffee scale. Being precise with measurements and strict with timing is, in my experience, the secret to consistently amazing brews. A difference of just 5 seconds in bloom time or 5g in water amount can affect your final cup.
Conclusion
Blooming might seem like a small step in your coffee journey, but it’s one of those details that separates a good cup from an exceptional one. The extra 30-45 seconds spent on proper blooming will reward you with enhanced flavors and aromas that might have been missing from your brew all along.
One thing I’ve always remembered is that pour-over methods like V60 have made coffee flavors much more distinguishable to my palate. That clarity of flavor begins with a proper bloom.
So Brewmates, next time you’re preparing your morning pour-over, take a moment to appreciate the blooming phase. Watch those bubbles form, inhale the intensified aroma, and prepare yourself for a superior cup of coffee. Your taste buds will thank you!
Have you experimented with different blooming techniques? Or perhaps you’ve found the perfect bloom time for your favorite beans? Share your experiences in the comments – I’d love to hear how other coffee enthusiasts approach this crucial brewing step!
AD PLACEMENT


 Business Stories
 Coffee World
 Drink Discoveries
 Tea Stories


AD PLACEMENT
